** 영상으로 공부하고 싶은 분은 아래 주소를 클릭하세요!
https://www.youtube.com/watch?v=iw5wmnc-37k
1. CSS 속성선택자
- 꼭 input태그를 위해서 나온 것은 아니지만 input태그에 활용하기 좋은 선택자
- 다른 태그에 사용해도 괜찮다.
1) 문법
요소[태그속성명=태그속성값]{ CSS속성명: CSS속성값; }
2) 예시
input[type=text]{ border: 1px solid red; }
3) 코드
<!doctype html>
<html>
    <head>
        <meta charset="utf-8">
        <title>폼 양식 태그</title>
        <style type="text/css">
            input[type=text]{ border: 1px solid red; }
            input[type=password]{ border: 1px solid blue; }
        </style>
    </head>
    <body>
        <form action="#">
            <input type="text">
            <input type="password">
        </form>
    </body>
</html>
4) 코드 완성뷰

- <input type="text">는 테두리가 빨간색으로 처리
- <input type="password">는 테두리가 파란색으로 처리되는 것을 확인할 수 있다.
2. input태그의 상태선택자
- input태그의 상태에 따라 다르게 선택되는 선택자
- 보통 상태선택자는 input:영문{ }으로 작성
1) input태그의 상태선택자 종류
| 선택자 | 설명 |
| input:enabled | input태그가 사용가능할 때의 CSS설정해주는 선택자 |
| input:disabled | input태그가 사용불가능할 때의 CSS설정해주는 선택자 |
| input:focus | input태그에 초점을 받았을때의 CSS설정해주는 선택자 |
| input:checked | input태그가 체크되었을때의 CSS설정해주는 선택자 |
| input::placeholder | input태그의 예시텍스트(placeholder)의 CSS설정해주는 선택자 |
2) 예시 코드
<!doctype html>
<html>
    <head>
        <meta charset="utf-8">
        <title>폼 양식 태그</title>
        <style type="text/css">
            input:disabled{ background-color: black; }
            input:enabled{ background-color: pink; }

            input:focus{ background-color: yellow; }

            input{ color: blue; }
            input::placeholder{ color: red; }

            input:checked + label{ color: red; }
        </style>
    </head>
    <body>
        <form action="#">
            <fieldset>
                <legend>사용과 초점관련</legend>
                <input type="text">
                <input type="text">
                <input type="text" disabled>
            </fieldset>
            <fieldset>
                <legend>예시텍스트관련</legend>
                <input type="text" placeholder="예시텍스트">
            </fieldset>
            <fieldset>
                <legend>체크관련</legend>
                <input type="checkbox" id="chk">
                <label for="chk">아이디 저장하기</label>
            </fieldset>
        </form>
    </body>
</html>
- 사용불가능한 input태그는 배경색을 검정색으로 처리
- 사용가능한 input태그는 배경색을 핑크색으로 처리
- 초점 받은 input태그는 배경색을 노란색으로 처리
- 사용자가 입력한 입력상자의 글자는 파란색으로 처리
input태그 자체에 color값을 조정하면 value값이 변경되는 것임
- input태그의 예시 텍스트는 빨간색 처리
- input태그가 체크가 된다면 바로 뒤에 있는 label태그의 글자색을 빨간색으로 변경
3) 코드 완성 뷰

3. textarea태그의 resize속성
- resize속성은 요소의 크기를 사용자가 변할수 있게 해주는 속성
- 보통 모든 태그에 설정이 가능함
- textarea태그는 크롬에서 미리 조정될 수 있게 설정되어 있다보니 막는 것이 좋음
1) resize 속성값
| 속성값 | 설명 |
| none | 사용자가 요소를 크기를 변경하지 못하게 처리 |
| horizontal | 사용자가 요소를 수평적으로 크기 변경하게 처리 |
| vertical | 사용자가 요소를 수직적으로 크기 변경하게 처리 |
| both | 사용자가 요소를 수평수직적을 모두 크기 변경하게 처리 |
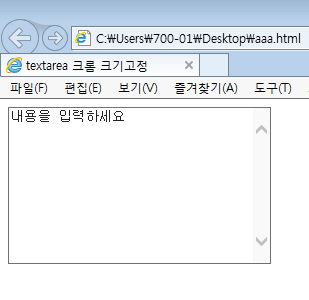
2) 익스플로러의 textarea
- 익스플로러는 resize속성 자체를 모두 막음

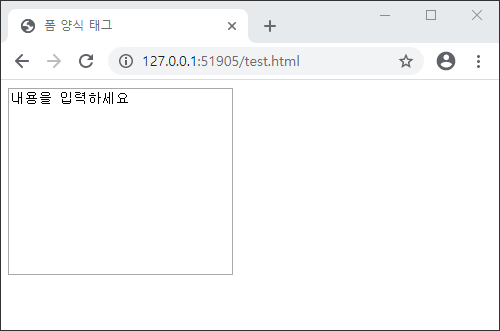
3) 크롬에서의 textarea


- 드래그 하니 커지는 것을 확인
4) CSS코드에서 resize: none; 처리
textarea{ resize: none; }
- 아래 드래그 시 사이즈 변화할 수 있는 표식 제거

'웹언어 > CSS3' 카테고리의 다른 글
| [CSS3강좌] 18강 CSS3선택자 (0) | 2020.05.19 |
|---|---|
| [CSS3강좌] 17강 CSS2선택자 (0) | 2020.05.19 |
| [CSS3강좌] 15강 블록요소의 자손을 가로 세로 가운데 정렬하기 (0) | 2020.05.18 |
| [CSS3강좌] 14강 테이블 태그 관련 CSS속성 (0) | 2020.05.18 |
| [CSS3강좌] 13강 위치속성(position) (0) | 2020.05.06 |


