728x90
반응형

** 영상으로 보고 싶은 분은 아래를 클릭해주세요.
https://www.youtube.com/watch?v=L7zdQ6uV3fY
1. 글자관련 속성 정리
| 속성명 | 설명 | |
| color (글자색 지정 속성) |
키워드 | h1{ color: red; } =>영문 |
| rgb방식 | h1{ color: rgb(100,100,100); } | |
| hsl방식 | h1{ color: hsl(50,20%,50%); } | |
| hex코드 | h1{ color: #000000; } | |
| rgba방식 | h1{ color: rgba(100,100,100,0.5); | |
| hsl방식 | h1{ color: hsla(50,20%,50%,0.5); } | |
| text-align (문단 가로 정렬) |
left | 글자를 왼쪽에 지정 |
| right | 글자를 오른쪽에 지정 | |
| center | 글자를 가운데 지정 | |
| justify | 요소에 가로 폭이 있는 경우 양쪽 정렬 | |
| text-decoration (글자 줄 지정 속성) |
underline | 밑줄 지정 |
| overline | 윗줄 지정 | |
| line-through | 가운데 줄 지정 | |
| none | 밑줄 나오는 글자를 밑줄 없앰 | |
| text-transform (영문 대소문자 지정 속성) |
uppercase | 영문을 모두 대문자로 변경 |
| lowercase | 영문을 모두 소문자로 변경 | |
| capitalize | 영문의 첫글자만 대문자로 변경 | |
| text-indent | 첫줄 들여쓰기 | |
| letter-spacing | 글자간의 간격 조정 | |
| word-spacing | 단어간의 간격 조정 | |
| line-height | 줄간격 조정 | |
| direction | 글자 방향 전환 - ltr(기본값-왼쪽~오른쪽), rtl(오른쪽~왼쪽) | |
| text-shadow | 글자 그림자 처리 | h1{ text-shadow: 2px 2px 2px red; } h1{ text-shadow: x축 y축 번짐 색상; } |
2. color속성 - 글자색 지정 속성
1) 코드뷰
<!DOCTYPE html>
<html lang="ko">
    <head>
        <meta charset="utf-8">
        <title>CSS3 - 글자관련 속성</title>
        <style type="text/css">
            .text01{ color: pink; }
            .text02{ color: rgb(255,0,0); }
            .text03{ color: #FF0000; }
            .text04{ color: hsl(240,100%,50%); }
            .text05{ color: rgba(255,0,0,0.5); }
            .text06{ color: hsla(240,100%,50%,0.5); }
        </style>
    </head>
    <body>
        <h2 class="text01">키워드방식</h2>
        <h2 class="text02">RGB방식</h2>
        <h2 class="text03">HEX코드방식</h2>
        <h2 class="text04">HSL방식</h2>
        <h2 class="text05">RGBA방식</h2>
        <h2 class="text06">HSLA방식</h2>
    </body>
</html>
2) 코드 완성뷰

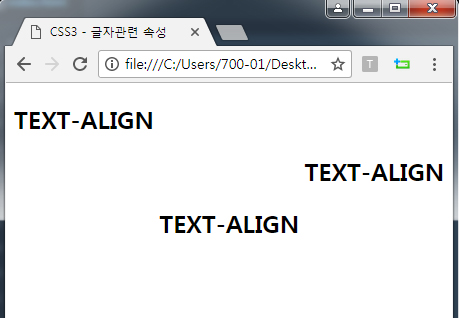
3. text-align : 문단 가로지정속성
1) 코드 뷰
<!DOCTYPE html>
<html lang="ko">
    <head>
        <meta charset="utf-8">
        <title>CSS3 - 글자관련 속성</title>
        <style type="text/css">
            .text01{ text-align: left; }
            .text02{ text-align: right; }
            .text03{ text-align: center; }
        </style>
    </head>
    <body>
        <h2 class="text01">TEXT-ALIGN</h2>
        <h2 class="text02">TEXT-ALIGN</h2>
        <h2 class="text03">TEXT-ALIGN</h2>
    </body>
</html>
2) 코드 완성뷰
3) justify : 양쪽 정렬 => 이때는 텍스트에 <br />태그는 사용하면 안됨
<!DOCTYPE html>
<html lang="ko">
    <head>
        <meta charset="utf-8">
        <title>CSS3 - 글자관련 속성</title>
        <style type="text/css">
            p{
                width: 300px; padding: 10px; border: 5px solid black;
                text-align: justify;
            }
        </style>
    </head>
    <body>
        <h1>그렇더라고요</h1>
        <p>
            오늘 많이 힘들었던 하루였죠
            그댈 보는 내 가슴이 아리네요
            지친 그대를 위해 해줄 수 있는 건 오로지
            곁에 있어주는 것 밖에 못해 미안해요
        </p>
    </body>
</html>
4) justify완성뷰

4. text-decoration : 글자 줄지정 속성
1) 코드뷰
<!DOCTYPE html>
<html lang="ko">
    <head>
        <meta charset="utf-8">
        <title>CSS3 - 글자관련 속성</title>
        <style type="text/css">
            .text01{ text-decoration: underline; }
            .text02{ text-decoration: line-through; }
            .text03{ text-decoration: overline; }
            .text04 > a{ text-decoration: none; }
        </style>
    </head>
    <body>
        <h2 class="text01">underline</h2>
        <h2 class="text02">line-through</h2>
        <h2 class="text03">overline</h2>
        <h2 class="text04"><a href="#">none</a></h2>
    </body>
</html>
2) 코드 완성뷰

5. text-transform : 영어 대소문자 지정속성
1) 코드 완성뷰
<!DOCTYPE html>
<html lang="ko">
    <head>
        <meta charset="utf-8">
        <title>CSS3 - 글자관련 속성</title>
        <style type="text/css">
            .text01{ text-transform: uppercase; }
            .text02{ text-transform: lowercase; }
            .text03{ text-transform: capitalize; }
        </style>
    </head>
    <body>
        <h2 class="text01">uppercase</h2>
        <h2 class="text02">lowercase</h2>
        <h2 class="text03">capitalize</h2>
    </body>
</html>
2) 코드 완성뷰

6. text-indent : 첫줄들여쓰기
1) 코드 뷰
<!DOCTYPE html>
<html lang="ko">
    <head>
        <meta charset="utf-8">
        <title>CSS3 - 글자관련 속성</title>
        <style type="text/css">
            p{
                width: 300px; padding: 10px; border: 5px solid black;
                text-indent: 50px;
            }
        </style>
    </head>
    <body>
        <h1>그렇더라고요</h1>
        <p>
            오늘 많이 힘들었던 하루였죠
            그댈 보는 내 가슴이 아리네요
            지친 그대를 위해 해줄 수 있는 건 오로지
            곁에 있어주는 것 밖에 못해 미안해요
        </p>
    </body>
</html>
2) 코드 완성뷰

7. letter-spacing : 글자간격조정
1) 코드 뷰
<!DOCTYPE html>
<html lang="ko">
    <head>
        <meta charset="utf-8">
        <title>CSS3 - 글자관련 속성</title>
        <style type="text/css">
            .text01{ letter-spacing: 10px; }
            .text02{ letter-spacing: 20px; }
            .text03{ letter-spacing: 30px; }
        </style>
    </head>
    <body>
        <h2 class="text01">letter-spacing</h2>
        <h2 class="text02">letter-spacing</h2>
        <h2 class="text03">letter-spacing</h2>
    </body>
</html>
2) 코드 완성뷰

8. word-spacing : 단어간의 간격조정
1) 코드 뷰
<!DOCTYPE html>
<html lang="ko">
    <head>
        <meta charset="utf-8">
        <title>CSS3 - 글자관련 속성</title>
        <style type="text/css">
            .text01{ word-spacing: 20px; }
            .text02{ word-spacing: 40px; }
            .text03{ word-spacing: 60px; }
        </style>
    </head>
    <body>
            <h2 class="text01">word spacing</h2>
            <h2 class="text02">word spacing</h2>
            <h2 class="text03">word spacing</h2>
    </body>
</html>
2) 코드 완성뷰

9. line-height : 줄간격 조정
1) 코드 뷰
<!DOCTYPE html>
<html lang="ko">
    <head>
        <meta charset="utf-8">
        <title>CSS3 - 글자관련 속성</title>
        <style type="text/css">
            p{
                width: 300px; padding: 10px; border: 5px solid black;
            }
            .lh{ line-height: 50px;
        </style>
    </head>
    <body>
        <h1>그렇더라고요</h1>
        <p>
            오늘 많이 힘들었던 하루였죠
            그댈 보는 내 가슴이 아리네요
            지친 그대를 위해 해줄 수 있는 건 오로지
            곁에 있어주는 것 밖에 못해 미안해요
        </p>
        <p class="lh">
            오늘 많이 힘들었던 하루였죠
            그댈 보는 내 가슴이 아리네요
            지친 그대를 위해 해줄 수 있는 건 오로지
            곁에 있어주는 것 밖에 못해 미안해요
        </p>
    </body>
</html>
2) 코드 완성뷰

10. text-shadow : 글자 그림자 속성
1) 코드 뷰
<!DOCTYPE html>
<html lang="ko">
    <head>
        <meta charset="utf-8">
        <title>CSS3 - 글자관련 속성</title>
        <style type="text/css">
            .text01{ text-shadow: 2px 2px 2px red; }
            .text02{ text-shadow: 2px 2px 2px green; }
            .text03{ text-shadow: 2px 2px 2px blue; }
        </style>
    </head>
    <body>
        <h2 class="text01">text-shadow</h2>
        <h2 class="text02">text-shadow</h2>
        <h2 class="text03">text-shadow</h2>
    </body>
</html>
2) 코드 완성뷰

728x90
반응형
'웹언어 > CSS3' 카테고리의 다른 글
| [CSS3강좌] 6강 리스트(ol, ul)관련 속성 (0) | 2020.04.25 |
|---|---|
| [CSS3강좌] 5강 FONT(글자관련속성) (0) | 2020.04.25 |
| [CSS3강좌] 3강 CSS색상넣기(컬러값처리) (0) | 2020.04.25 |
| [CSS3강좌] 2강 CSS기본선택자 (0) | 2020.04.23 |
| [CSS3강좌] 1강 CSS문법과 스타일시트 (0) | 2020.04.23 |


