1. CSS filter 속성
- filter속성은 요소에 대한 시각효과를 지정합니다. (ex) blur효과 등)
- 간단히 생각하면 포토샵에서의 layer style이나 adjustment(보정) 등이 지정된다고 보면 편합니다.
- 하지만 최신 브라우저에서만 될 수 있기 때문에 브라우저 지원이 어디까지 되는지 확인해보세요.
1) filter속성의 함숫값
| 종류 | 설명 |
| none | 기본값, 이펙트를 없앰 |
| blur(px) | 이미지에 흐림효과를 적용 값이 클수록 흐림이 더 많이 생성, 값을 작성하지 않으면 0으로 지정 |
| brightness(%) | 이미지 밝기를 조정 0%는 완전히 검게 처리, 100%는 기본값, 100%보다 크면 밝게 제공 |
| contrast(%) | 이미지의 대비를 조정 0%는 완전히 검게 처리, 100%는 기본값, 100%보드 크면 더많은 대비를 처리 |
| drop-shadow(x y blur 색상) | 이미지에 그림자 효과를 지정 x, y는 그림자의 위치를 지정, blur는 흐림정도, 색상은 그림자색상처리 |
| graysclae(%) | 이미지를 회색조로 변환 0%가 기본값, 100%는 이미지를 완전 회색 처리, 음수는 없음 |
| hue-rotate(deg) | 이미지에 색조 회전을 적용 0deg ~ 360deg |
| invert(%) | 이미지를 색상 반전 0%는 기본값원본, 100%는 이미지를 완전히 반전 |
| opacity(%) | 이미지의 투명도를 지정 0%~100%, 100%가 기본값 |
| saturate(%) | 이미지 채도 지정 0%는 이미지의 채도를 완전 없앰, 100%가 기본에 원본, 100%를 초과하면 채도높임 |
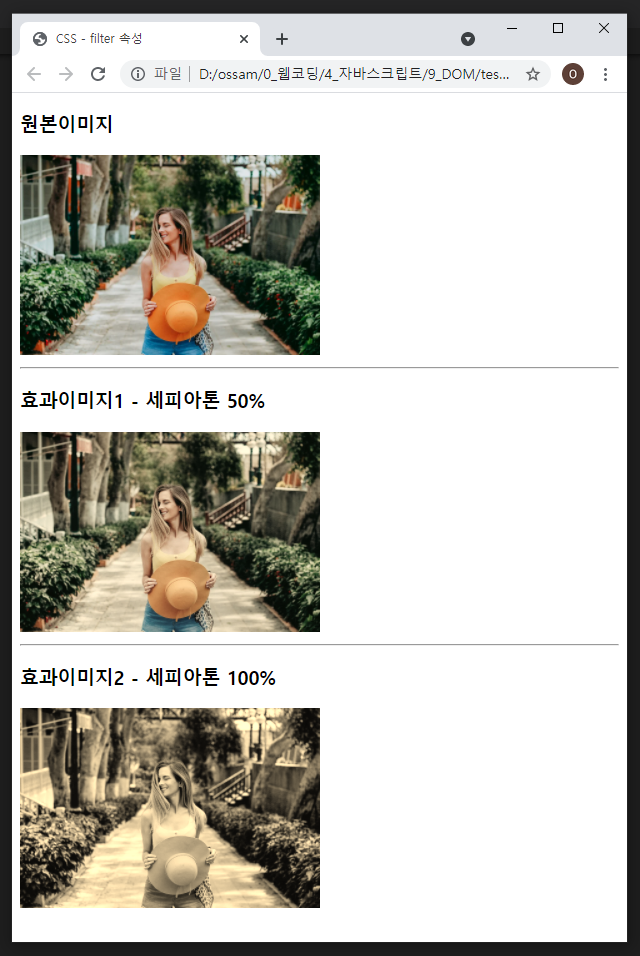
| sepia(%) | 이미지를 세피아톤으로 변환 0%~100%, 0%가 기본에 원본 |
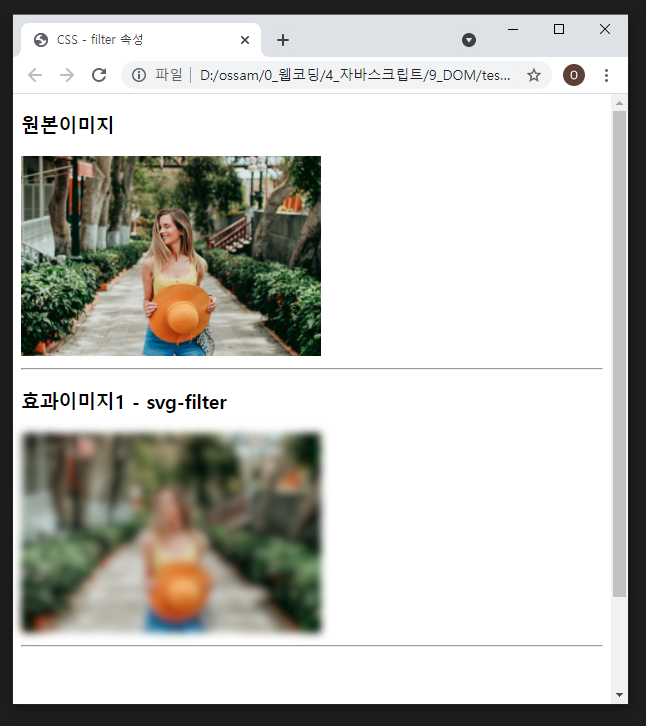
| url( ) | url( )함수는 SVG필터를 지정하는 XML파일의 위치를 가져오고 특정 필터요소에 대한 경로를 포함 |
2) filter 브라우저 지원
| 브라우저 | 크롬 | 익스플로러/엣지 | 파이어폭스 | 사파리 | 오페라 |
| 버전 | 53.0 이상 | 13.0 이상 | 35.0 이상 | 9.1 이상 | 40.0 이상 |
2. CSS filter 속성 예제
1) blur( )
- 이미지에 흐림 효과를 적용
- 픽셀 단위 사용
- 값이 클수록 흐림이 더 많이 생성, 값을 작성하지 않으면 0으로 지정
## 코드 예시
<!DOCTYPE html>
<html lang="ko">
    <head>
        <meta charset="UTF-8">
        <title>CSS - filter 속성</title>
        <style>
            .test{
                filter: blur(5px);
            }
        </style>
    </head>
    <body>
        <h3>원본이미지</h3>
        <img src="https://cdn.pixabay.com/photo/2021/05/13/18/18/fashion-6251535_960_720.jpg" width="400" alt="테스트이미지">
        <hr>
        <h3>효과이미지</h3>
        <img src="https://cdn.pixabay.com/photo/2021/05/13/18/18/fashion-6251535_960_720.jpg" width="400" alt="테스트이미지" class="test">
    </body>
</html>
## 코드 결과

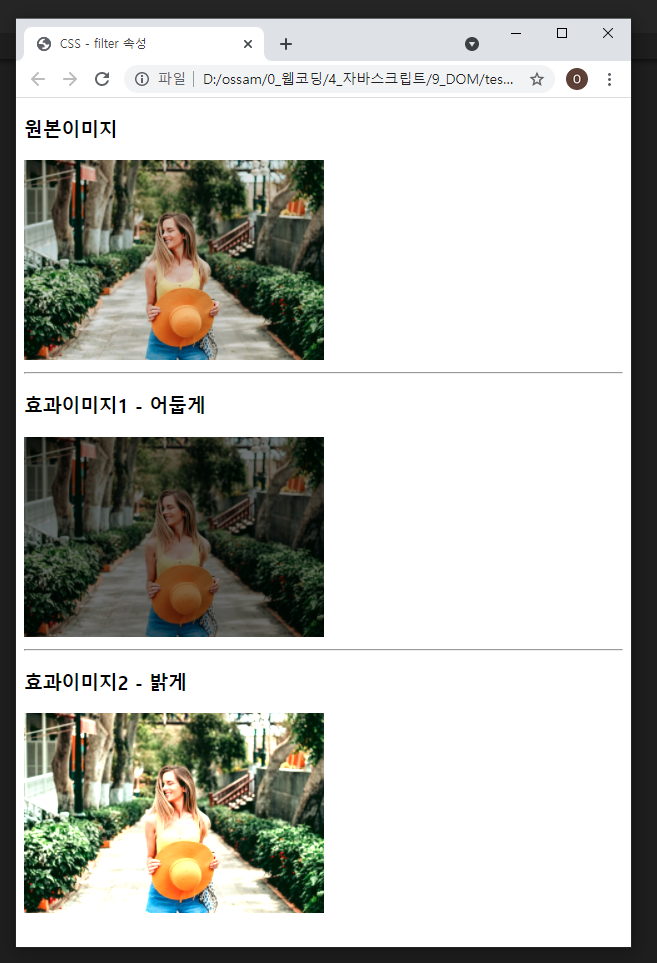
2) brightness( )
- 이미지에 밝기 지정
- % 단위 사용
- 0%는 완전히 검게 처리, 100%는 기본값, 100%보다 크면 밝게 제공
## 코드 예시
<!DOCTYPE html>
<html lang="ko">
    <head>
        <meta charset="UTF-8">
        <title>CSS - filter 속성</title>
        <style>
            .test01{ filter: brightness(50%); }
            .test02{ filter: brightness(150%); }
        </style>
    </head>
    <body>
        <h3>원본이미지</h3>
        <img src="https://cdn.pixabay.com/photo/2021/05/13/18/18/fashion-6251535_960_720.jpg" width="300" alt="테스트이미지">
        <hr>
        <h3>효과이미지1 - 어둡게</h3>
        <img src="https://cdn.pixabay.com/photo/2021/05/13/18/18/fashion-6251535_960_720.jpg" width="300" alt="테스트이미지" class="test01">
        <hr>
        <h3>효과이미지2 - 밝게</h3>
        <img src="https://cdn.pixabay.com/photo/2021/05/13/18/18/fashion-6251535_960_720.jpg" width="300" alt="테스트이미지" class="test02">
    </body>
</html>
## 코드 결과
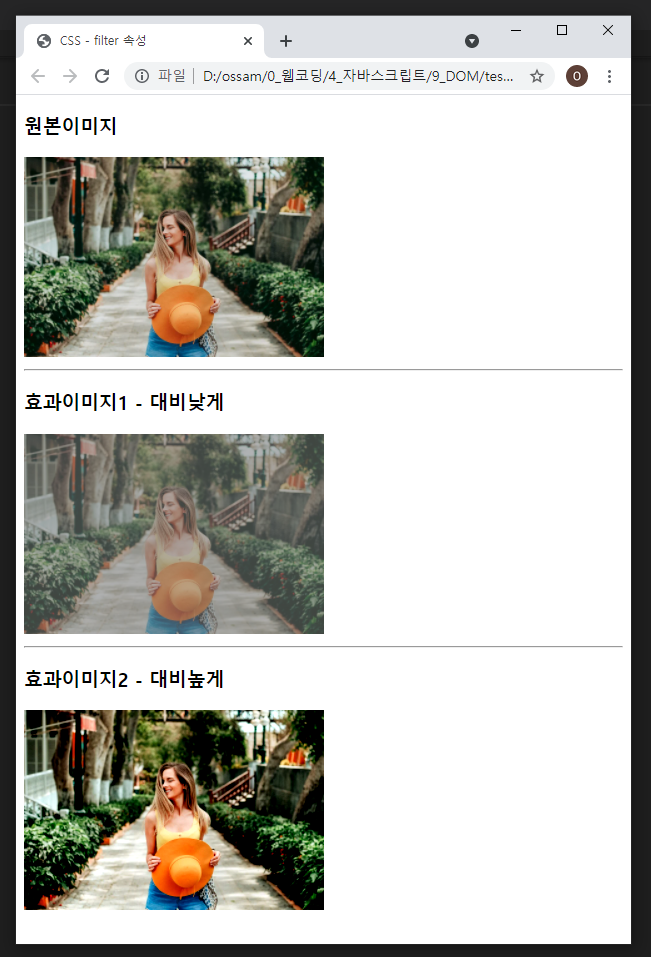
3) contrast( )
- 이미지에 대비 지정
- 0%는 완전히 검게 처리, 100%는 기본값, 100% 보다 크면 더 많은 대비를 처리
## 코드 예시
<!DOCTYPE html>
<html lang="ko">
    <head>
        <meta charset="UTF-8">
        <title>CSS - filter 속성</title>
        <style>
            .test01{ filter: contrast(50%); }
            .test02{ filter: contrast(150%); }
        </style>
    </head>
    <body>
        <h3>원본이미지</h3>
        <img src="https://cdn.pixabay.com/photo/2021/05/13/18/18/fashion-6251535_960_720.jpg" width="300" alt="테스트이미지">
        <hr>
        <h3>효과이미지1 - 대비낮게</h3>
        <img src="https://cdn.pixabay.com/photo/2021/05/13/18/18/fashion-6251535_960_720.jpg" width="300" alt="테스트이미지" class="test01">
        <hr>
        <h3>효과이미지2 - 대비높게</h3>
        <img src="https://cdn.pixabay.com/photo/2021/05/13/18/18/fashion-6251535_960_720.jpg" width="300" alt="테스트이미지" class="test02">
    </body>
</html>
## 코드 결과
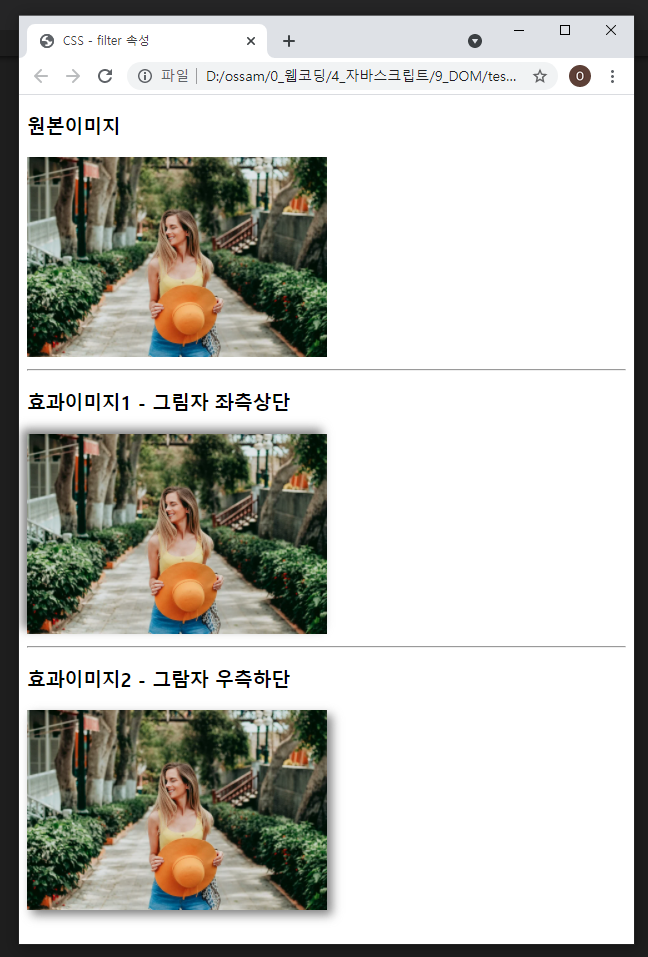
4) drop-shadow( )
- 이미지에 그림자 지정
- drop-shadow(x y blur color)
## 코드 예시
<!DOCTYPE html>
<html lang="ko">
    <head>
        <meta charset="UTF-8">
        <title>CSS - filter 속성</title>
        <style>
            .test01{ filter: drop-shadow(-5px -5px 5px gray); }
            .test02{ filter: drop-shadow(5px 5px 5px gray); }
        </style>
    </head>
    <body>
        <h3>원본이미지</h3>
        <img src="https://cdn.pixabay.com/photo/2021/05/13/18/18/fashion-6251535_960_720.jpg" width="300" alt="테스트이미지">
        <hr>
        <h3>효과이미지1 - 그림자 좌측상단</h3>
        <img src="https://cdn.pixabay.com/photo/2021/05/13/18/18/fashion-6251535_960_720.jpg" width="300" alt="테스트이미지" class="test01">
        <hr>
        <h3>효과이미지2 - 그람자 우측하단</h3>
        <img src="https://cdn.pixabay.com/photo/2021/05/13/18/18/fashion-6251535_960_720.jpg" width="300" alt="테스트이미지" class="test02">
    </body>
</html>
## 코드 결과
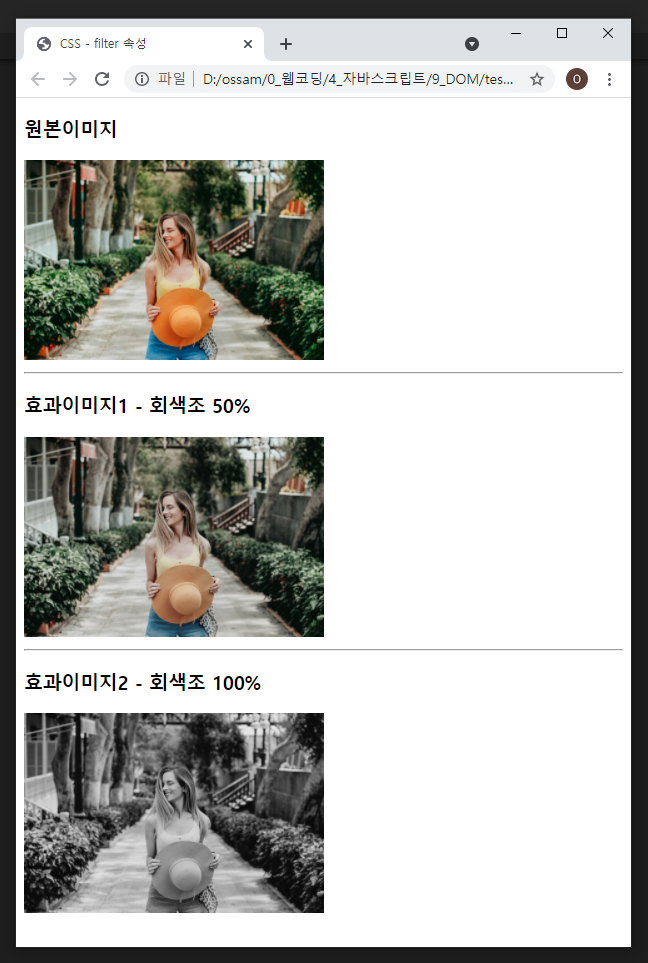
5) grayscale( )
- 이미지를 회색조로 변환
- 0%가 기본값, 100%는 이미지를 완전 회색 처리, 음수는 없음
## 코드 예시
<!DOCTYPE html>
<html lang="ko">
    <head>
        <meta charset="UTF-8">
        <title>CSS - filter 속성</title>
        <style>
            .test01{ filter: grayscale(50%); }
            .test02{ filter: grayscale(100%); }
        </style>
    </head>
    <body>
        <h3>원본이미지</h3>
        <img src="https://cdn.pixabay.com/photo/2021/05/13/18/18/fashion-6251535_960_720.jpg" width="300" alt="테스트이미지">
        <hr>
        <h3>효과이미지1 - 회색조 50%</h3>
        <img src="https://cdn.pixabay.com/photo/2021/05/13/18/18/fashion-6251535_960_720.jpg" width="300" alt="테스트이미지" class="test01">
        <hr>
        <h3>효과이미지2 - 회색조 100%</h3>
        <img src="https://cdn.pixabay.com/photo/2021/05/13/18/18/fashion-6251535_960_720.jpg" width="300" alt="테스트이미지" class="test02">
    </body>
</html>
## 코드 결과
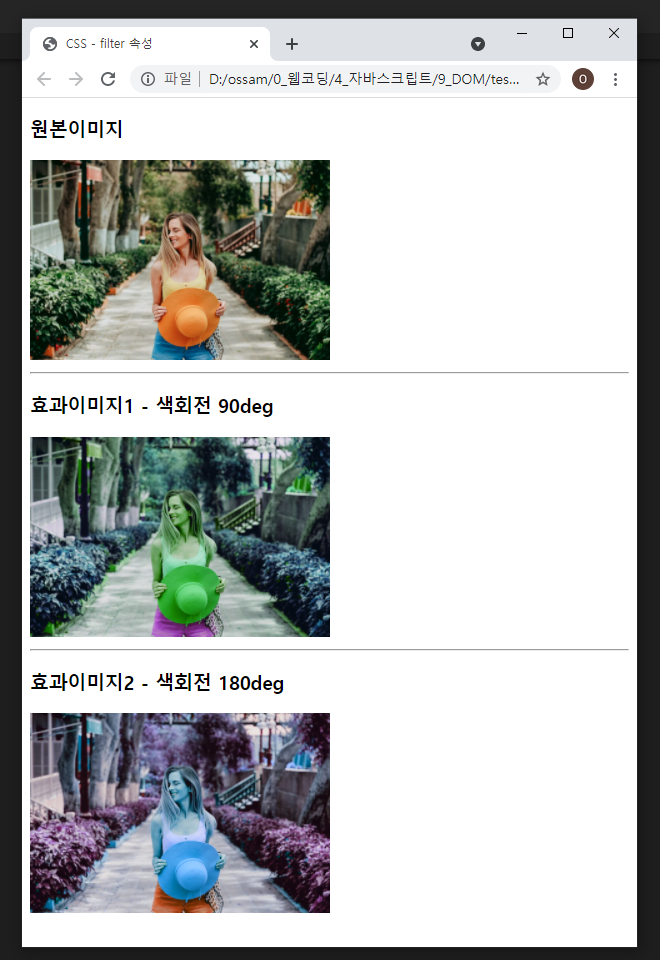
6) hue-rotate( )
- 이미지에 색조 회전을 적용
- 0deg ~ 360deg
## 코드 예시
<!DOCTYPE html>
<html lang="ko">
    <head>
        <meta charset="UTF-8">
        <title>CSS - filter 속성</title>
        <style>
            .test01{ filter: hue-rotate(90deg); }
            .test02{ filter: hue-rotate(180deg); }
        </style>
    </head>
    <body>
        <h3>원본이미지</h3>
        <img src="https://cdn.pixabay.com/photo/2021/05/13/18/18/fashion-6251535_960_720.jpg" width="300" alt="테스트이미지">
        <hr>
        <h3>효과이미지1 - 색회전 90deg</h3>
        <img src="https://cdn.pixabay.com/photo/2021/05/13/18/18/fashion-6251535_960_720.jpg" width="300" alt="테스트이미지" class="test01">
        <hr>
        <h3>효과이미지2 - 색회전 180deg</h3>
        <img src="https://cdn.pixabay.com/photo/2021/05/13/18/18/fashion-6251535_960_720.jpg" width="300" alt="테스트이미지" class="test02">
    </body>
</html>
## 코드 결과
7) invert( )
- 이미지를 색상 반전
- 0%는 기본값 원본, 100%는 이미지를 완전히 반전
## 코드 예시
<!DOCTYPE html>
<html lang="ko">
    <head>
        <meta charset="UTF-8">
        <title>CSS - filter 속성</title>
        <style>
            .test01{ filter: invert(50%); }
            .test02{ filter: invert(100%); }
        </style>
    </head>
    <body>
        <h3>원본이미지</h3>
        <img src="https://cdn.pixabay.com/photo/2021/05/13/18/18/fashion-6251535_960_720.jpg" width="300" alt="테스트이미지">
        <hr>
        <h3>효과이미지1 - 반전 50%</h3>
        <img src="https://cdn.pixabay.com/photo/2021/05/13/18/18/fashion-6251535_960_720.jpg" width="300" alt="테스트이미지" class="test01">
        <hr>
        <h3>효과이미지2 - 반전 100%</h3>
        <img src="https://cdn.pixabay.com/photo/2021/05/13/18/18/fashion-6251535_960_720.jpg" width="300" alt="테스트이미지" class="test02">
    </body>
</html>
## 코드 결과
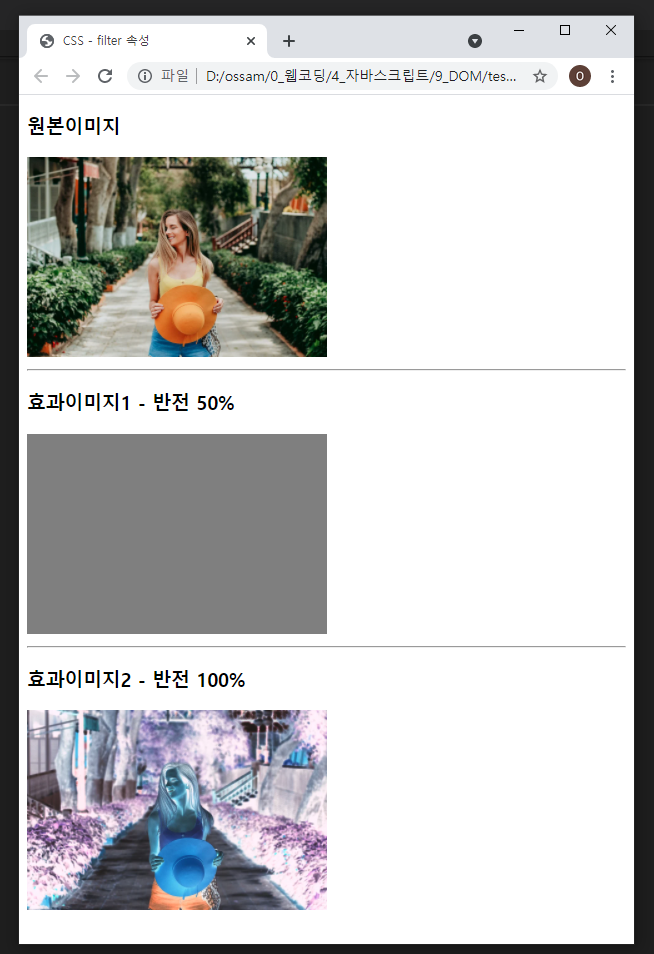
- 중간은 처리되지 않습니다. 0%와 100%만 사용하세요!
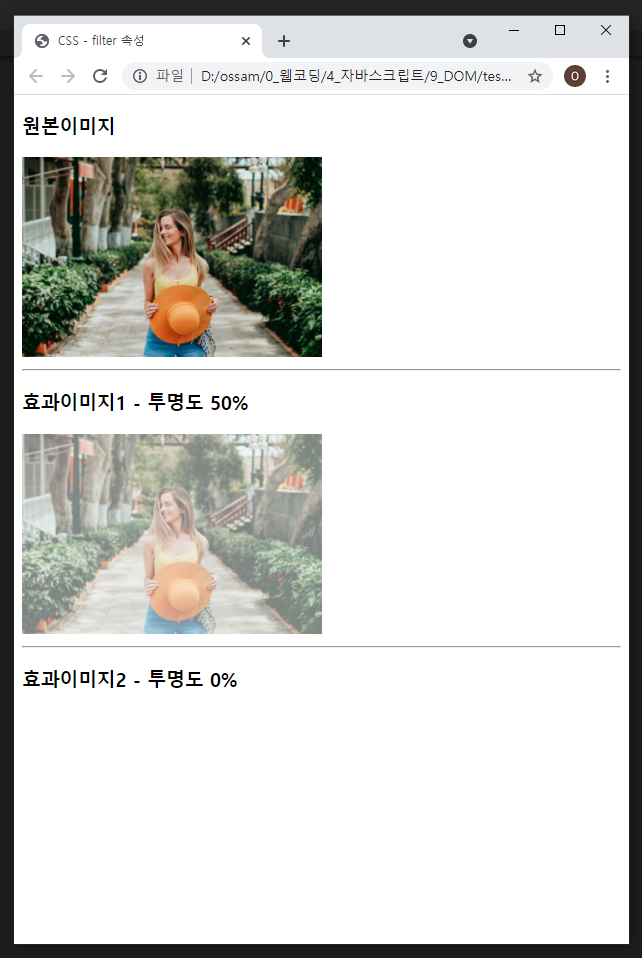
8) opacity( )
- 이미지의 투명도를 지정
- 0%~100%, 100%가 기본값
## 코드 예시
<!DOCTYPE html>
<html lang="ko">
    <head>
        <meta charset="UTF-8">
        <title>CSS - filter 속성</title>
        <style>
            .test01{ filter: opacity(50%); }
            .test02{ filter: opacity(0%); }
        </style>
    </head>
    <body>
        <h3>원본이미지</h3>
        <img src="https://cdn.pixabay.com/photo/2021/05/13/18/18/fashion-6251535_960_720.jpg" width="300" alt="테스트이미지">
        <hr>
        <h3>효과이미지1 - 투명도 50%</h3>
        <img src="https://cdn.pixabay.com/photo/2021/05/13/18/18/fashion-6251535_960_720.jpg" width="300" alt="테스트이미지" class="test01">
        <hr>
        <h3>효과이미지2 - 투명도 0%</h3>
        <img src="https://cdn.pixabay.com/photo/2021/05/13/18/18/fashion-6251535_960_720.jpg" width="300" alt="테스트이미지" class="test02">
    </body>
</html>
## 코드 결과
9) saturate( )
- 이미지 채도 지정
- 0%는 이미지의 채도를 완전 없앰, 100%가 기본에 원본, 100%를 초과하면 채도 높임
## 코드 예시
<!DOCTYPE html>
<html lang="ko">
    <head>
        <meta charset="UTF-8">
        <title>CSS - filter 속성</title>
        <style>
            .test01{ filter: saturate(50%); }
            .test02{ filter: saturate(150%); }
        </style>
    </head>
    <body>
        <h3>원본이미지</h3>
        <img src="https://cdn.pixabay.com/photo/2021/05/13/18/18/fashion-6251535_960_720.jpg" width="300" alt="테스트이미지">
        <hr>
        <h3>효과이미지1 - 채도낮춤</h3>
        <img src="https://cdn.pixabay.com/photo/2021/05/13/18/18/fashion-6251535_960_720.jpg" width="300" alt="테스트이미지" class="test01">
        <hr>
        <h3>효과이미지2 - 채도높임</h3>
        <img src="https://cdn.pixabay.com/photo/2021/05/13/18/18/fashion-6251535_960_720.jpg" width="300" alt="테스트이미지" class="test02">
    </body>
</html>
## 코드 결과

10) sepia( )
- 이미지를 세피아톤으로 변환
- 0%~100%, 0%가 기본에 원본
## 코드 예시
<!DOCTYPE html>
<html lang="ko">
    <head>
        <meta charset="UTF-8">
        <title>CSS - filter 속성</title>
        <style>
            .test01{ filter: sepia(50%); }
            .test02{ filter: sepia(100%); }
        </style>
    </head>
    <body>
        <h3>원본이미지</h3>
        <img src="https://cdn.pixabay.com/photo/2021/05/13/18/18/fashion-6251535_960_720.jpg" width="300" alt="테스트이미지">
        <hr>
        <h3>효과이미지1 - 세피아톤 50%</h3>
        <img src="https://cdn.pixabay.com/photo/2021/05/13/18/18/fashion-6251535_960_720.jpg" width="300" alt="테스트이미지" class="test01">
        <hr>
        <h3>효과이미지2 - 세피아톤 100%</h3>
        <img src="https://cdn.pixabay.com/photo/2021/05/13/18/18/fashion-6251535_960_720.jpg" width="300" alt="테스트이미지" class="test02">
    </body>
</html>
## 코드 결과
11) 여러 효과 한 번에 처리
## 문법
선택자{ filter: 필터함수() 필터함수(); }
## 코드 예시
<!DOCTYPE html>
<html lang="ko">
    <head>
        <meta charset="UTF-8">
        <title>CSS - filter 속성</title>
        <style>
            .test01{ filter: sepia(100%); }
            .test02{ filter: sepia(100%) brightness(150%); }
        </style>
    </head>
    <body>
        <h3>원본이미지</h3>
        <img src="https://cdn.pixabay.com/photo/2021/05/13/18/18/fashion-6251535_960_720.jpg" width="300" alt="테스트이미지">
        <hr>
        <h3>효과이미지1 - 세피아톤 100%</h3>
        <img src="https://cdn.pixabay.com/photo/2021/05/13/18/18/fashion-6251535_960_720.jpg" width="300" alt="테스트이미지" class="test01">
        <hr>
        <h3>효과이미지2 - 세피아톤 100% + 밝기 150%</h3>
        <img src="https://cdn.pixabay.com/photo/2021/05/13/18/18/fashion-6251535_960_720.jpg" width="300" alt="테스트이미지" class="test02">
    </body>
</html>
## 코드 결과

12) url( )
- svg태그로 만든 필터를 적용
## 코드 예시
- 예시로는 블러를 만들어보겠습니다.
<!DOCTYPE html>
<html lang="ko">
    <head>
        <meta charset="UTF-8">
        <title>CSS - filter 속성</title>
        <style>
            .test01{ filter: url(#svg-blur); }
        </style>
    </head>
    <body>
        <h3>원본이미지</h3>
        <img src="https://cdn.pixabay.com/photo/2021/05/13/18/18/fashion-6251535_960_720.jpg" width="300" alt="테스트이미지">
        <hr>
        <h3>효과이미지1 - svg-filter</h3>
        <img src="https://cdn.pixabay.com/photo/2021/05/13/18/18/fashion-6251535_960_720.jpg" width="300" alt="테스트이미지" class="test01">
        <hr>
        <svg id="svg-filter">
            <filter id="svg-blur">
                <feGaussianBlur in="SourceGraphic" stdDeviation="4"></feGaussianBlur>
            </filter>
        </svg>
    </body>
</html>
## 코드 결과
'웹언어 > CSS3' 카테고리의 다른 글
| [CSS3강좌] 36강 유동형 사이즈와 유동형 그리드 - 오쌤의 니가스터디 (0) | 2022.08.05 |
|---|---|
| [CSS3강좌] 35강 반응형웹을 위한 미디어쿼리(@media screen{ }) (1) | 2022.08.04 |
| [CSS3강좌] 33강 폰트가 깨져 보일때 해결법(IE) (0) | 2021.02.10 |
| [CSS3강좌] 32강 Background-clip과 mask효과 (0) | 2020.12.21 |
| [CSS3강좌] 31강 CSS outline속성 - 오쌤의 니가스터디 (0) | 2020.11.30 |


